Downloading & installing Add-ons on Kodi is a technical part that needs proper guidance, but when it comes to FreeTelly, a user gets a pre-configured. It is the easiest way to start with Kodi. There is nothing else left for further setup once you download FreeTelly. Those who have less shrewdness and practical knowledge in technology can easily configure this Kodi version into their windows system.
FreeTelly is a liter version TV ADD-ONS that takes less time to install than other add-ons. It allows the user to get more fast service on Kodi. You can configure Freetelly with customizations and Kodi Add-ons on the Windows system. If you are a new user or confuse with the Kodi configuration setup, then FreeTelly is the best option to gets the entertainment service. It does take time for you to understand the working process because it is user-friendly and design for easy to understand. The only thing you needed is to download FreeTelly into your Windows and follow the installation setup.
HOW TO DOWNLOAD FREETELLY FOR WINDOWS
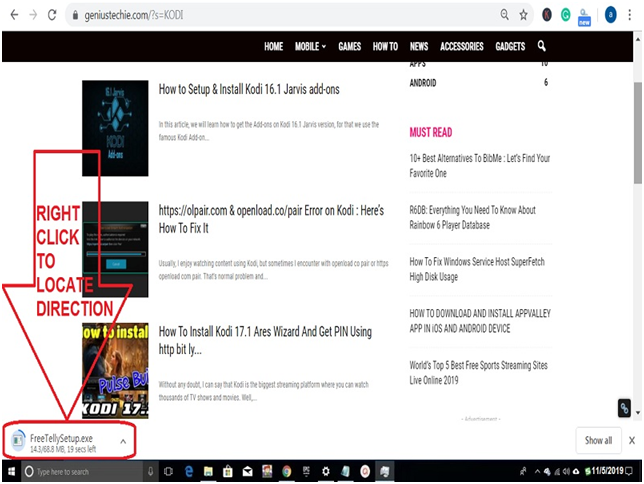
Step #1. While opening this article into your windows web browser (Google Chrome), click on the download button. Once downloading starts, it will take time according to your internet speed wait till complete. Right-click on downloaded TV add-ons files and “Show in folder” it will take you directly to the folder where .exe setup file is downloaded.
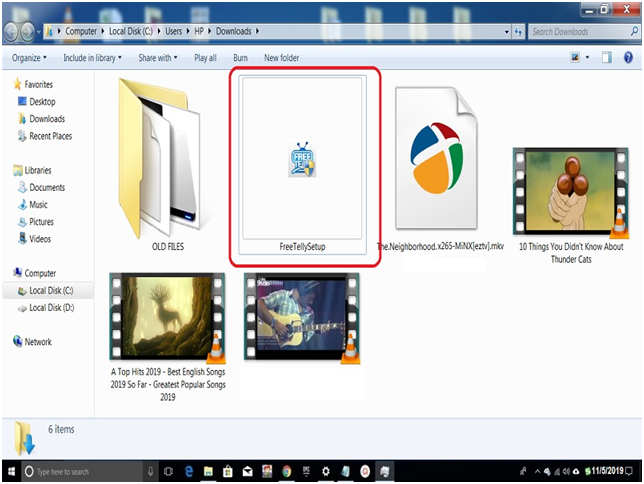
Step #2. As you can see, the file is downloaded, for install double click on the exe file and follow the installation guide steps.
Related Information:
- File Name: FreeTellySetup.exe
- Latest Version: 16.1
- Price: Free
- Size: 68.8MB
- Developed by: TV Add-OnsAdd-Ons for Kodi
Download FreeTelly for Windows
NOTE: If you get message notification error https://olpair.com & openload.co/pair then don’t worry, we have the natural solution to fix it because it is very common with the strong free TV ADDONS like FreeTelly on Kodi.
HOW TO INSTALL FREETELLY ON WINDOWS
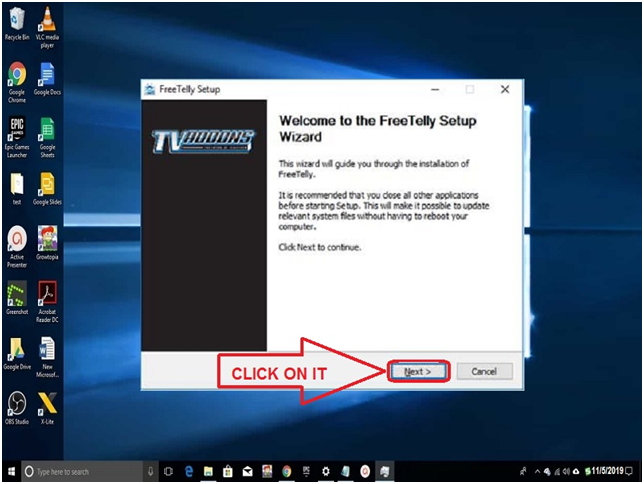
Step #1. Double click on the downloaded setup file and the installation window will pop up on the screen, click “Next” button.
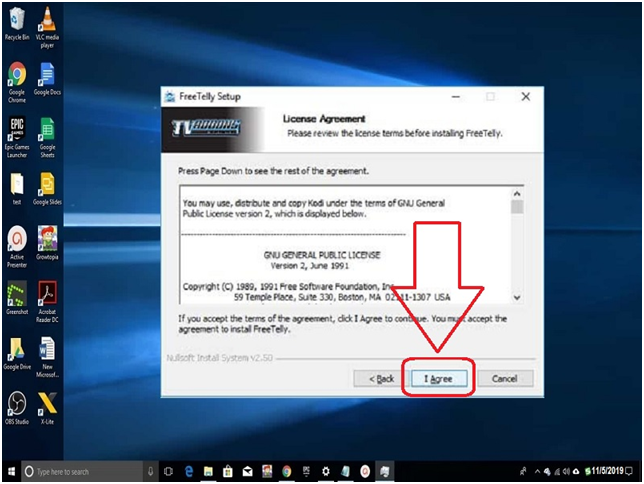
Step #2. Now at this step, click the “Agree” button; it will take your setup to the next level.
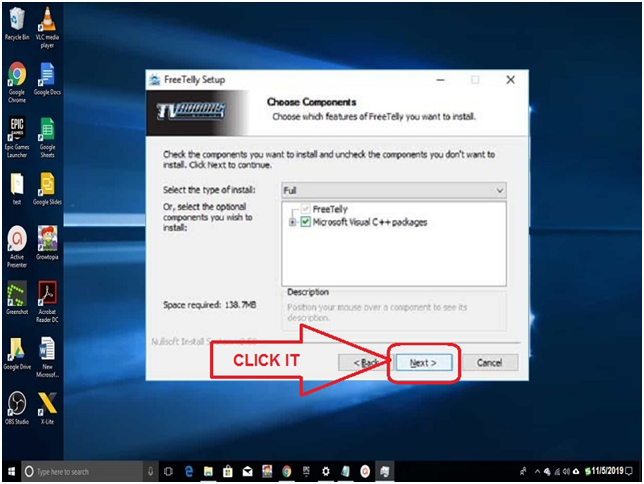
Step #3. Here you need to choose components; tick the box is not as seen screenshot and then click on the “NEXT” button. (Default full installation)
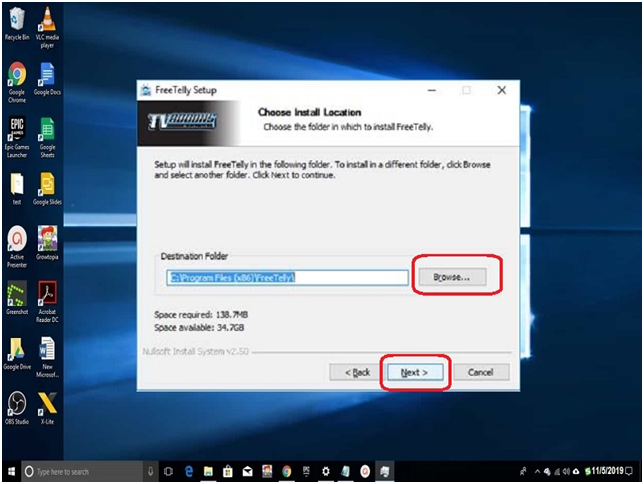
Step #4. Choose your install location by click on the “Browse..” button and then click the “NEXT” button.
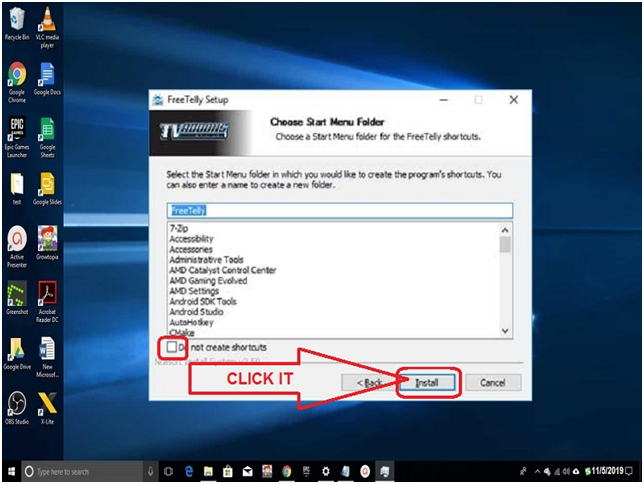
Step #5. Choose the start menu folder and tick on “do not create shortcuts” optional and then click the “INSTALL” button.
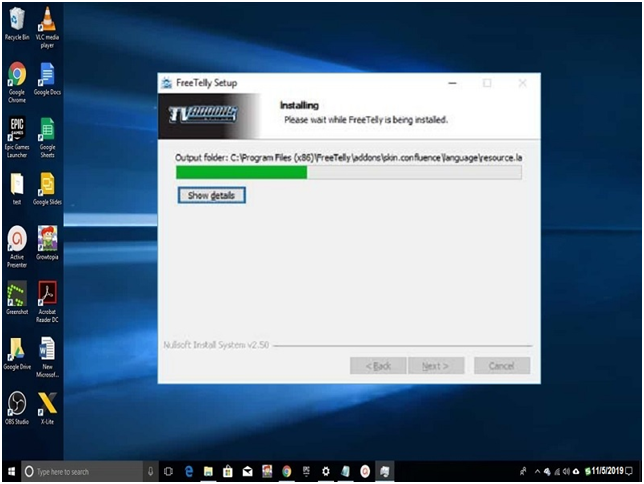
Step #6. As you can see in the screenshot, the FreeTelly installing process started after your verification above steps; wait until the green line complete.
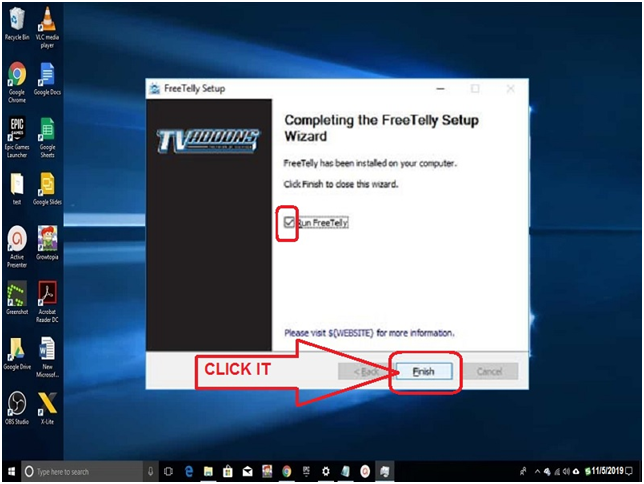
Step #7. After completion, you will ask to “Run FreeTelly” if you wanted then tick the box otherwise skip and directly click on the “Finish” button.
HOW TO CONFIGURE FREETELLY ON WINDOWS
Step #1. Click on the FreeTelly icon to open the app, and you will get the same screen, as seen in the screenshot. Click on the “OK” button.
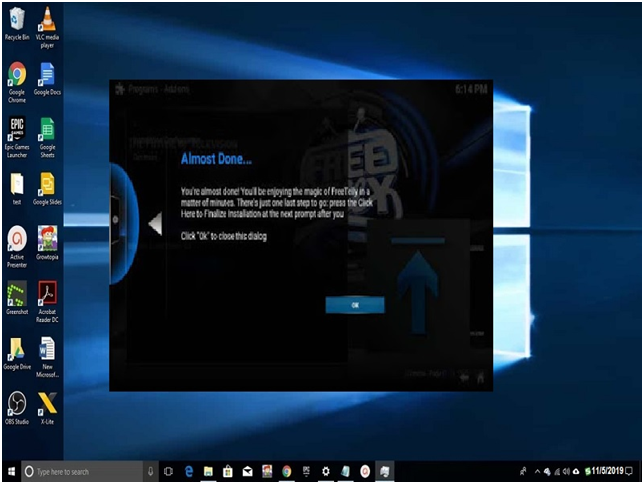
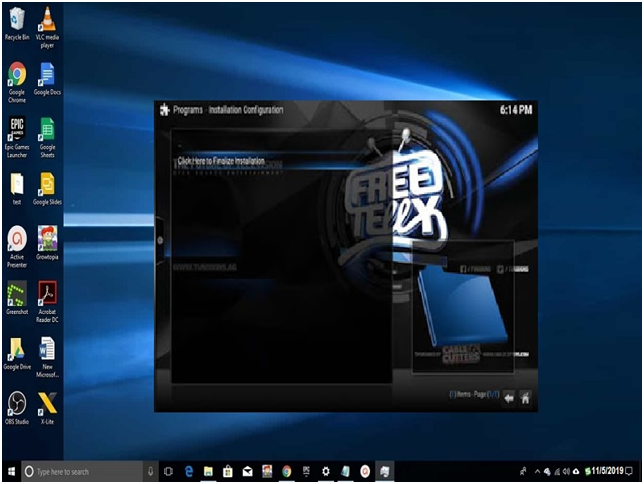
Step #2. At this stage, if installing configuration, select “Click Here to Finalize Installation.”
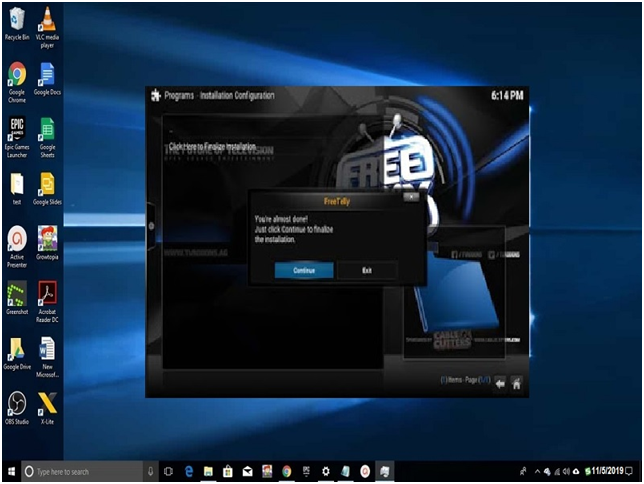
Step #3. You will see a confirmation box pop up on the screen click “Continue” button.
Step #4. According to your system, FreeTelly will download some configuration files, wait until complete 100%.
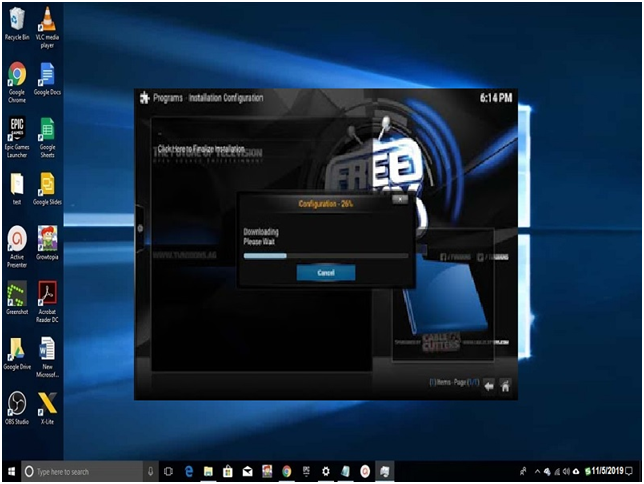
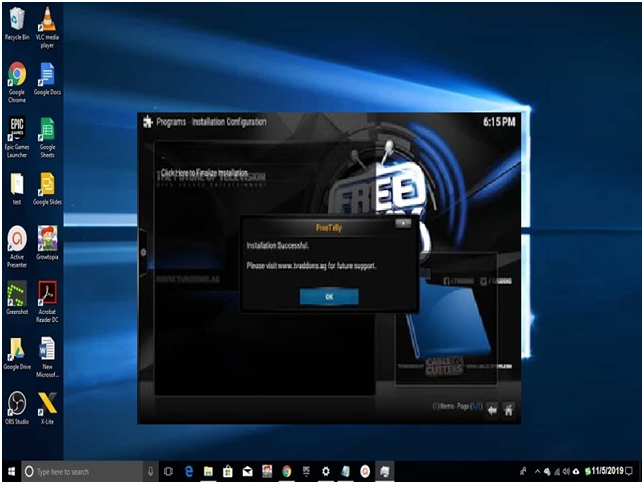
Step #5. After completed, click on the “OK” button.
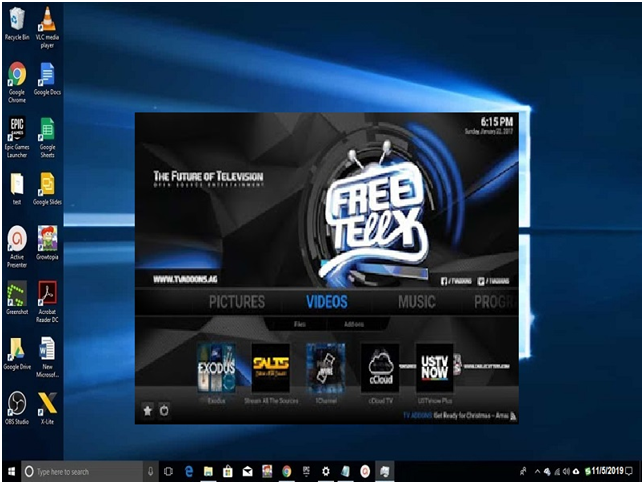
Step #6 Now, you can see that FreeTelly is ready to operate and enjoy free entertainment.
BONUS!!!!
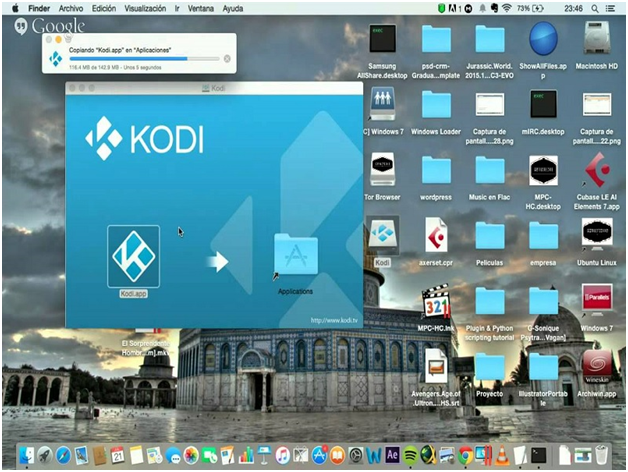
FreeTelly for Mac:
- Latest Version: 16.1
- Developed by: TV Add-OnsAdd-Ons for Kodi
- Price: Free
- File Name: FreeTellySetup.exe
SUGGESTION!!!
Final Words:
FreeTelly looks like Kodi, but it is not from the Kodi team. You can operate this TV add-on on Windows and MAC systems directly without any third device or software support. If you are Firestick, TV box, or Android device user, then you need to install Kodi first where you can add the configure wizard follow by TV Add-ons. This combination will provide you a similar function as you get on FreeTelly Windows. If you get any trouble during the installation process, then contact us through the comment box, and don’t forget to tell everyone about this easy and simple configure TV Add-ons direct play on the Windows system.


![SIMS 4 Download Free For PC Full Version 2019 [UPDATED] SIMS 4 Download](https://www.geniustechie.com/wp-content/uploads/2019/03/SIMS-4-Download-100x70.jpg)

